Slideshow tutorial
At bottom right of mountainear’s slide display (or mine) click the little button marked 'slide' ringed in red:
That will take you to the Slide website’s opening page, as below (click on image to enlarge, then Back to return):

Down the bottom of that, browse to photos you have on your computer and upload one at a time. Each time you upload one the display above will show how it will appear (click on image to enlarge, then Back to return):

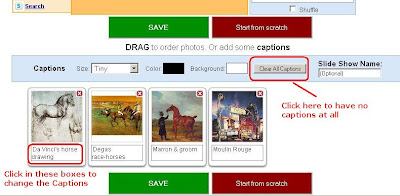
As you add photos, they will appear down at the bottom of the Slide window, so scroll down and see what you can do, be it adding Captions to each image, changing the size and colour of the Caption text and background or even choosing to have no captions at all, and the changes will take place as you make them (click to enlarge, Back to return):

When you’ve uploaded as many photos as you want, click on either of the green SAVE buttons, and you will be taken to the Sign Up page (click to enlarge, Back to return):

It’s probably a good idea to sign up so you can edit later, and remember to tick, or keep ticked, the box marked Remember Me, Then click the blue Sign Up button and you will be taken to the Share your slide show page, which is probably the most awkward part of the procedure (click to enlarge, Back to return):

Below the bit I’ve been able to copy are the instructions for copying and pasting the code into a blog post, so it shows up on your blog – I tried the 'Automatically add' section but it didn’t seem to do anything, so the second section, copying the code (which is all explained on the page) is a better route to follow, I think.
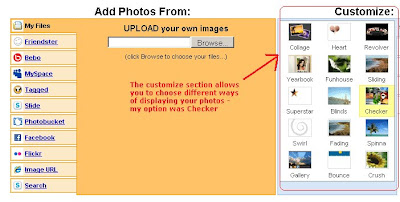
It took me several times to suss it out, but I'm sure you, like me, will get there in the end. Have fun, particularly with the Customize option, shown below, which allows different ways of presenting the photos.


No comments:
Post a Comment